Step-by-Step: DIY Soil Stabilization Techniques for Small-Scale Projects
Soil stabilization is a crucial step in any construction or landscaping project. With the right techniques, you can ensure that the soil underneath your project remains stable and able to support the weight and stress it will encounter. Whether you’re working on a small-scale DIY project or a larger endeavor, understanding how to stabilize the soil is essential.
DIY soil stabilization allows you to take control of your project and save money by avoiding the need for expensive professional services. By following a step-by-step process, you can create a solid foundation for your project and minimize the risks of soil erosion and settling. With a little patience and determination, you can achieve professional-grade results on your own.
In this article, we will guide you through the step-by-step process of DIY soil stabilization for small-scale projects. We’ll discuss different techniques, tools, and materials that you can use to stabilize the soil effectively. Whether you’re building a garden bed, a walkway, or a small retaining wall, these techniques will ensure that your project stands the test of time.
So, if you’re ready to roll up your sleeves and get your hands dirty, let’s dive into the world of soil stabilization. By following our step-by-step guide, you’ll be well-equipped to tackle your small-scale projects with confidence and achieve professional results.
Step-by-Step: DIY Soil Stabilization Techniques for Small-Scale Projects [Your Website Name]
Soil stabilization is crucial for small-scale projects where the soil needs reinforcement and enhancement to provide better support and longevity. By utilizing DIY techniques, you can save costs and achieve effective soil stabilization without relying on professional assistance.
Here are some step-by-step techniques for DIY soil stabilization:
1. Determine the soil condition: Assess the soil condition and identify any existing issues that need to be addressed. This could include factors such as poor drainage, erosion, or lack of compaction.
2. Prepare the soil: Clear the area of any debris, rocks, or vegetation. Ensure the soil is loose and easily workable before proceeding with stabilization techniques.
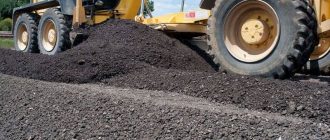
3. Choose a stabilization method: There are various methods available for soil stabilization, including the use of additives such as lime, cement, or asphalt emulsion. Research and select the most suitable method for your specific project.
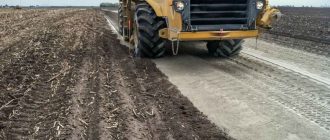
4. Excavate or mix: If necessary, excavate the soil to the desired depth or mix the stabilizing agent directly into the soil. Ensure thorough mixing to achieve proper distribution of the stabilizing agent.
5. Compact the soil: Use compaction equipment, such as a roller or plate compactor, to achieve proper compaction of the stabilized soil. This step is crucial to enhance the stability and load-bearing capacity of the soil.
6. Allow for curing time: Depending on the chosen stabilization method, allow sufficient curing time for the soil to achieve maximum strength and stability. Follow the manufacturer’s guidelines for the particular stabilizing agent used.
7. Monitor and maintain: Regularly monitor the stabilized soil for any signs of distress or deterioration. Perform routine maintenance, such as weed control and surface repairs, to ensure the longevity of your stabilized soil.
By following these step-by-step DIY soil stabilization techniques, you can effectively enhance the stability and durability of small-scale projects without the need for professional assistance. Remember to always prioritize safety and refer to expert advice if needed.
Preparing the Site
Before starting any soil stabilization project, it is important to properly prepare the site. This step-by-step DIY technique is designed for small-scale projects, making it accessible to individuals who want to improve the stability of their soil on their own.
Step 1: Clear the site of any debris or vegetation that could interfere with the stabilization process. This includes rocks, fallen branches, and weeds. Removing these obstacles will ensure that the stabilization technique can be effectively applied to the soil.
Step 2: Level the site using a shovel or a rake. Smooth out any uneven surfaces to create a more uniform and stable base for the soil stabilization technique. This will help to prevent future erosion and maintain the longevity of the stabilization efforts.
Step 3: Compact the soil by using a handheld compactor or a plate compactor. Apply pressure evenly across the site to compress the soil and improve its stability. This step is crucial in creating a solid foundation for the stabilization technique to be applied.
Step 4: Wet the soil slightly using a hose or sprinkler. Moist soil is more receptive to the stabilization technique and will allow for better absorption and bonding. However, be careful not to over-water the soil, as excessive moisture can hinder the effectiveness of the stabilization technique.
Step 5: Allow the soil to dry for a short period of time. This will help to further strengthen the soil and prepare it for the application of the stabilization technique. The exact drying time will depend on the specific soil type and weather conditions.
Step 6: Inspect the site for any remaining debris or uneven surfaces. If necessary, repeat steps 1-5 to ensure that the site is clean, level, and ready for the soil stabilization technique to be implemented.
By following this step-by-step DIY technique for preparing the site, individuals can set a solid foundation for their soil stabilization project. This will help to ensure the effectiveness and longevity of the stabilization technique applied, resulting in a more stable and secure soil for small-scale projects.
Assessing the Soil Condition
Before starting any soil stabilization project, it is important to assess the condition of the soil. This step is crucial as it helps determine the appropriate technique for DIY soil stabilization on a small-scale.
To assess the soil condition, there are a few key factors to consider:
1. Soil Composition:
Different types of soil have varying properties that affect their stability. It is important to identify the composition of the soil, whether it is sandy, clayey, or loamy. Sandy soil, for example, is typically less stable compared to clayey soil due to its low cohesion.
2. Moisture Content:
The moisture content of the soil plays a significant role in its stability. A soil that is too dry or too wet can lead to stability issues. Moisture content can be determined by conducting a simple test, such as the “hand squeeze test”.
3. Compaction:
Compaction refers to the density of the soil. Compacted soil is generally more stable compared to loose soil. To assess the compaction, a simple visual inspection can be done by examining the soil’s structure and texture.
4. Permeability:
Permeability refers to the soil’s ability to allow water to pass through. This property is important to consider as excessive water can lead to erosion and instability. Permeability can be assessed by conducting a simple drainage test using water and observing how quickly it is absorbed by the soil.
By thoroughly evaluating these factors, you will be able to determine the most suitable DIY soil stabilization technique for your small-scale project. This assessment will ensure that the chosen technique effectively addresses the specific soil conditions, resulting in a stable and long-lasting outcome.
Identifying the Type of Stabilization Technique
When it comes to small-scale soil stabilization projects, it is important to identify the appropriate technique for your specific needs. There are various techniques available, each designed to address different soil conditions and project requirements.
One common soil stabilization technique is lime stabilization, which involves the addition of lime to the soil to improve its stability and strength. This technique is often used for clay soils, as lime helps to reduce plasticity and improve workability.
Another popular technique is cement stabilization, which involves the addition of cement to the soil. Cement stabilization is effective for sandy soils, as it helps to bind the particles together and improve their load-bearing capacity.
For projects involving loose or granular soils, chemical stabilization may be the best option. This technique involves the use of chemical additives, such as polymer emulsions or soil stabilizers, to improve the soil’s strength and reduce its susceptibility to erosion.
In some cases, mechanical stabilization techniques may be used. These techniques involve the use of physical methods, such as compaction or grading, to improve the soil’s stability and reduce its susceptibility to settlement.
Before selecting a stabilization technique for your small-scale project, it is important to assess the soil conditions and project requirements. Consider factors such as soil type, moisture content, and load-bearing capacity. Consulting with a soil engineer or stabilization expert can also help you determine the most suitable technique for your project.
Mixing the Stabilizing Agent
Once you have prepared the soil for stabilization, it’s time to mix the stabilizing agent. This step is crucial in ensuring that the soil is properly stabilized for your small-scale DIY projects.
Here is a step-by-step guide on how to mix the stabilizing agent:
- Gather all the necessary materials and equipment, including the stabilizing agent, water, a mixing container, and a mixing tool.
- Read the instructions provided with the stabilizing agent to determine the appropriate mixing ratio. Different stabilizing agents may require different ratios, so it’s important to follow the instructions carefully.
- Pour the correct amount of stabilizing agent into the mixing container. Make sure to measure the agent accurately to ensure proper stabilization.
- Add water to the stabilizing agent according to the recommended ratio. This may require measuring the water as well, depending on the instructions.
- Use the mixing tool to thoroughly mix the stabilizing agent and water. Make sure there are no lumps or dry spots in the mixture.
- Continue mixing until the stabilizing agent is evenly distributed and the mixture has a consistent texture. This may take a few minutes of thorough mixing.
Once you have mixed the stabilizing agent, you can move on to the next step in the soil stabilization process.
Remember, proper mixing of the stabilizing agent is crucial for achieving effective soil stabilization in your small-scale DIY projects. Take your time and follow the instructions provided with the agent to ensure the best results.
Applying the Stabilizing Agent
Once you have prepared the soil and chosen the appropriate stabilizing agent, it’s time to apply the agent to the soil. Follow these step-by-step techniques to ensure the best results for your small-scale stabilization projects:
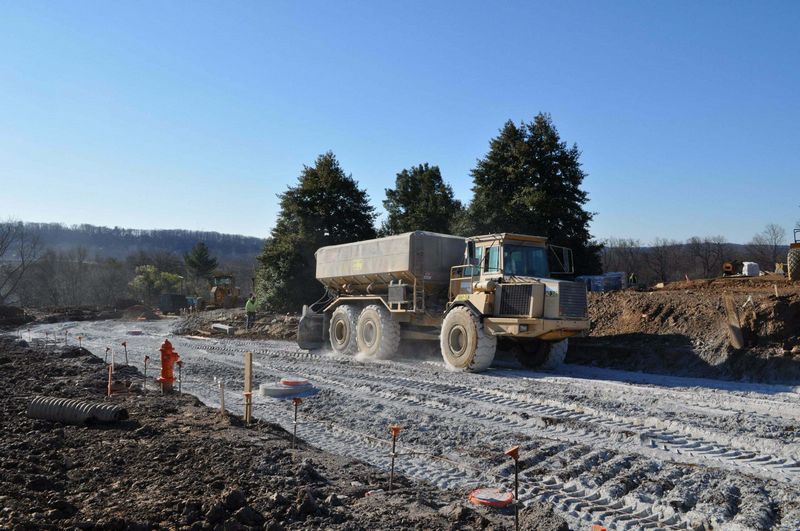
- Before applying the stabilizing agent, ensure that the soil is thoroughly dampened. This will help the agent bind properly with the soil particles.
- Measure out the recommended amount of stabilizing agent according to the manufacturer’s instructions. This will vary depending on the type of agent and the soil conditions.
- Sprinkle the stabilizing agent evenly over the soil surface. Use a spreader or your hands to distribute the agent in a uniform manner.
- After applying the agent, use a rake or shovel to mix the agent into the top layer of soil. This will help ensure that the agent is evenly distributed and mixed thoroughly with the soil.
- Continue mixing the soil and stabilizing agent until you achieve a consistent mixture. The soil should have a uniform appearance and texture.
- Once the stabilizing agent is thoroughly incorporated into the soil, use a compactor or roller to compress the soil. This will help further bind the soil particles together and strengthen the overall stability.
- Repeat these steps for each section of soil that requires stabilization, working in small sections at a time.
By following these step-by-step techniques, you can effectively apply the stabilizing agent to your small-scale soil stabilization projects and achieve improved stability and durability.
Compact the Treated Soil
Once you have completed the soil stabilization process, the next step is to compact the treated soil. This is an important step in the DIY soil stabilization process, as it helps to increase the density and strength of the soil.
To compact the treated soil, you will need a compactor or a roller. These machines help to compress the soil particles together, reducing any air gaps and increasing the overall stability of the soil. Depending on the size of your project, you can rent or purchase a compactor or a roller from a local equipment rental company.
Before you begin compacting the soil, it is important to prepare the area. Remove any debris or vegetation from the surface of the soil, as these can interfere with the compaction process. Use a rake or a shovel to level the soil surface, ensuring that it is even and free from any obstructions.
Start the compactor or roller and slowly drive it over the treated soil, applying even pressure. Make multiple passes over different sections of the soil to ensure that it is compacted uniformly. Pay particular attention to any areas that may require extra compaction, such as slopes or corners.
While compacting the soil, be mindful of any safety precautions. Wear appropriate protective gear, such as safety glasses and gloves, and ensure that you are operating the compactor or roller in a safe manner. It is also important to follow any manufacturer instructions or guidelines for operating the equipment.
After compacting the soil, visually inspect the surface for any signs of unevenness or gaps. If you notice any areas that require additional compaction, make additional passes with the compactor or roller to achieve the desired level of compaction.
Remember that the level of compaction required will depend on the specific needs of your small-scale project. Consult any project specifications or guidelines to determine the necessary compaction parameters.
By compacting the treated soil, you are further enhancing its stability and strength. This will help to ensure that your small-scale project is durable and long-lasting, providing a solid foundation for any structures or landscaping activities.
Allowing for Curing Time
Once you have completed the soil stabilization process using various DIY techniques for small-scale projects, it is important to allow the treated soil to cure properly. Curing time refers to the period during which the stabilized soil gains strength and stability.
The length of time required for soil stabilization to cure depends on several factors, including the type of stabilizing agent used, the thickness of the treated layer, and the weather conditions. In general, it is recommended to allow for a curing time of at least 7 to 14 days.
During this curing period, it is important to protect the treated soil from excessive moisture, direct sunlight, and heavy traffic. These factors can negatively affect the curing process and compromise the stability of the stabilized soil. To protect the soil, consider covering it with a tarp or a layer of mulch to provide shade and limit moisture exposure.
Additionally, avoid any construction activities or heavy loads on the treated soil during the curing period. This will prevent any undue stress on the curing soil and ensure its long-term stability. It is important to closely monitor the soil during the curing process and make sure it remains undisturbed.
Once the recommended curing time has passed, you can proceed with any further construction work or utilize the stabilized soil as intended. However, keep in mind that the full strength of the stabilized soil may take several months to develop, so it is advisable to continue monitoring and maintaining the treated area.
By allowing for proper curing time after using DIY soil stabilization techniques for small-scale projects, you can ensure the long-term stability and durability of your construction or landscaping endeavors.
Performing Regular Inspections
Regular inspections are crucial for the success of any soil stabilization project, especially when it comes to small-scale DIY projects. By conducting regular inspections, you can identify any issues or potential problems early on and take necessary actions to prevent them from escalating.
During inspections, carefully examine the soil to ensure it is compacted and stable. Look for any signs of erosion, such as exposed roots or gullies, as well as areas that may have shifted or settled. Pay attention to the overall surface conditions, including the presence of cracks or unevenness.
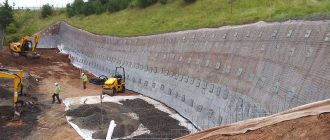
Inspect any reinforcements used, such as geotextiles or geo-grids, for signs of damage or deterioration. Check if they are properly installed and securely anchored to the soil. Additionally, assess the drainage system to ensure it is functioning effectively and preventing water accumulation.
It is recommended to create a checklist of inspection points and regularly document your findings. This will help you track the progress of the project and identify any patterns or recurring issues. Make sure to address any concerns promptly to ensure the stability and longevity of the soil stabilization measures.
By performing regular inspections, you can maintain the integrity of your DIY soil stabilization project and mitigate any potential risks or problems. It is an essential step in ensuring the success of your small-scale project and the longevity of the techniques employed.
Addressing any Issues
When undertaking a DIY soil stabilization project, it is important to be prepared for any potential issues that may arise. Here are a few common problems that you may encounter and some steps you can take to address them:
- Uneven ground: If you are dealing with uneven ground, you will first need to assess the severity of the issue. Minor unevenness can often be compensated for by adding an extra layer of stabilizing material, such as crushed stone or sand, to the lower areas. If the unevenness is more pronounced, you may need to level the ground using a compacting machine.
- Drainage problems: Proper drainage is crucial for soil stabilization. If you notice standing water or poor drainage in the area, you may need to address this before proceeding. One option is to install a French drain or a similar drainage system to redirect excess water away from the stabilized area. Additionally, grading the soil to create a slope away from the project area can help improve drainage.
- Weed growth: Weeds can pose a problem for soil stabilization projects, as they can disrupt the stability of the soil and compete with plants or vegetation you have planted. To address this issue, it is important to remove any existing weeds before starting the project. You can use a herbicide or manually pull out the weeds. After the stabilization process, consider applying a weed barrier or mulch to prevent weed growth.
- Erosion: Erosion can occur over time and can compromise the stability of the soil. To prevent erosion, consider using erosion control measures such as geotextiles or erosion control blankets. These materials can help prevent soil erosion and provide additional stability to the project area.
By addressing these common issues, you can ensure the success of your DIY soil stabilization project. Remember to closely follow the step-by-step techniques for small-scale projects to achieve the desired results.
Frequently asked questions:
How can I stabilize soil for small-scale projects?
There are several DIY techniques you can use to stabilize soil for small-scale projects. One method is to mix cement with the soil to create a solid base. Another option is to use geogrids or geotextiles, which are synthetic materials that help reinforce the soil. You can also try adding lime to stabilize the soil. Each method has its own benefits and limitations, so choose the one that best suits your project’s needs.
What are the advantages of using cement to stabilize soil?
Using cement to stabilize soil offers several advantages. Firstly, it improves the load-bearing capacity of the soil, making it suitable for construction projects. Secondly, it helps reduce soil erosion and prevents water from seeping through. Additionally, cement-stabilized soil is more resistant to changes in moisture content, making it a durable option for long-term use.
Can I stabilize soil without using cement?
Yes, you can stabilize soil without using cement. One alternative method is to use geogrids or geotextiles. These materials are placed in layers within the soil to provide reinforcement and improve its stability. Another option is to add lime to the soil. Lime helps increase the soil’s pH level, which in turn improves its stability. Ultimately, the choice of stabilization method depends on the specific requirements and constraints of your project.
Are there any limitations or drawbacks to DIY soil stabilization techniques?
While DIY soil stabilization techniques can be effective for small-scale projects, they do have limitations and drawbacks. For instance, using cement can be expensive and time-consuming, especially for larger areas. Geogrids and geotextiles may not be suitable for all soil types, and their installation requires careful planning and expertise. Additionally, excessive or improper use of stabilizers can negatively impact the natural properties of the soil. It is important to assess the specific needs of your project and consult with experts if needed to ensure the best results.