Ultimate Guide to Using Thin Stone Veneer
Using thin stone veneer can transform the look and feel of any space, whether it’s a residential or commercial project. This ultimate guide will provide you with everything you need to know about using thin stone veneer, from the installation process to designing and maintaining the perfect finish.
Thin stone veneer is a popular choice for many reasons. Not only is it a cost-effective alternative to traditional stone, but it also offers a lightweight and flexible option that can be easily installed on various surfaces. Whether you’re looking to enhance the exterior of your home or create a stunning feature wall indoors, thin stone veneer provides endless design possibilities.
When it comes to installation, proper preparation is key. From cleaning the surface to ensuring a secure adhesive bond, each step contributes to a successful and long-lasting installation. In this guide, we’ll walk you through the installation process, including tips and tricks for achieving a seamless look.
Designing with thin stone veneer allows you to unleash your creativity. Whether you prefer a rustic, natural look or a modern, sleek finish, thin stone veneer can be customized to suit your style. With a wide range of colors, textures, and patterns available, you can create a unique and personalized space that reflects your taste and personality.
Maintaining thin stone veneer is relatively easy, but it’s essential to follow a few simple steps to keep it looking its best. From routine cleaning to protecting against weather damage, we’ll provide you with expert tips on how to care for your thin stone veneer and ensure its longevity.
Using thin stone veneer is an excellent choice for adding beauty and value to your space. With proper installation, creative design, and regular maintenance, you can create a stunning and durable finish that will stand the test of time.
Benefits of Using Thin Stone Veneer
Using thin stone veneer offers a number of benefits when it comes to designing and installing stone in your home or commercial space. Here are some of the advantages:
1. Aesthetic Appeal: Thin stone veneer provides a beautiful and natural look that adds character and style to any space. The texture and color variations of the stone create a visually pleasing and unique design element.
2. Lightweight: As the name suggests, thin stone veneer is significantly lighter than traditional stone. This makes it easier to handle and install, reducing labor costs and allowing for more creative and intricate designs.
3. Easy Installation: Thin stone veneer is designed to be simple and straightforward to install. It can be adhered to a variety of surfaces, such as concrete, plywood, or drywall, with minimal effort and tools required.
4. Cost-effective: Thin stone veneer is generally more affordable than full-thickness stone. This makes it a budget-friendly option for homeowners and businesses looking to achieve the look of natural stone without breaking the bank.
5. Versatility: Thin stone veneer can be used in a variety of applications, including interior and exterior walls, fireplace surrounds, accents, and more. Its versatility allows for endless design possibilities and the ability to customize any space.
6. Durability: Despite its thin profile, thin stone veneer is still durable and long-lasting. It is resistant to fading, cracking, and chipping, making it a reliable choice for both residential and commercial projects.
7. Low maintenance: Once installed, thin stone veneer requires minimal maintenance. It can be easily cleaned with water and a mild detergent, and it does not require sealing or special treatments to maintain its appearance.
Overall, using thin stone veneer provides numerous benefits in terms of aesthetics, versatility, and cost-effectiveness. Whether you are looking to enhance the interior or exterior of your space, thin stone veneer is a versatile and durable option to consider.
Choosing the Right Thin Stone Veneer
When it comes to using thin stone veneer in your design projects, it’s important to choose the right type of stone to achieve the desired look and functionality. This guide will help you navigate the wide variety of options available and make an informed decision.
1. Consider the style: Thin stone veneer comes in different styles, such as rustic, contemporary, and traditional. Think about the overall aesthetic you want to achieve and select a stone veneer that complements it. For example, a rustic style may call for a stone veneer with a rough texture, while a contemporary style may require a smooth and sleek stone veneer.
2. Evaluate the color: Thin stone veneer is available in a wide range of colors, from earthy tones to vibrant hues. Take into account the color scheme of your project and choose a stone veneer color that harmonizes with the surrounding elements. For a cohesive look, consider selecting a stone veneer color that complements or contrasts with the existing design palette.
3. Assess the size and shape: Thin stone veneer comes in a variety of sizes and shapes, including flats and corners. Determine the size and shape that best suits your project. Consider the scale of the project and the desired texture, as well as any specific architectural details that may influence the choice of thin stone veneer.
4. Look for durability: Thin stone veneer should be able to withstand the test of time and weather conditions. Ensure that the stone veneer you choose is durable and resistant to moisture, freezing temperatures, and damage caused by environmental factors. Consider the intended use of the stone veneer and select a product that is suitable for both interior and exterior applications.
5. Consider the installation process: Thin stone veneer can be installed using different methods, such as mortar, adhesive, or mechanical fasteners. Take into account the installation process that is most convenient for your project and select a stone veneer that is compatible with that method. Additionally, consider the availability of installation resources and expertise to ensure a successful installation.
Choosing the right thin stone veneer is essential to achieving a beautiful and durable result. By considering the style, color, size and shape, durability, and installation process, you can select a stone veneer that meets your design requirements and enhances the overall aesthetic of your project.
Preparing the Surface for Thin Stone Veneer Installation
Before installing thin stone veneer, it is important to properly prepare the surface to ensure a successful and long-lasting installation. Here is a step-by-step guide on how to prepare the surface:
- Clean the surface: Begin by thoroughly cleaning the area where the thin stone veneer will be installed. Use a brush or hose to remove any dirt, dust, or debris from the surface. This will create a clean and smooth base for the installation.
- Repair any damages: Inspect the surface for any cracks, holes, or other damages. Use a suitable filler or patching compound to repair these imperfections. Allow the filler to dry and sand it down to create a flat and even surface.
- Apply a waterproofing membrane: To prevent any moisture from seeping through the surface and damaging the thin stone veneer, it is recommended to apply a waterproofing membrane. Follow the manufacturer’s instructions for proper application and drying time.
- Install a metal lath: To provide a secure base for the thin stone veneer, it is necessary to install a metal lath. Attach the lath to the surface using galvanized nails or screws, making sure that it is securely fastened and evenly spaced.
- Apply a scratch coat: The next step is to apply a scratch coat, which will help the thin stone veneer adhere to the surface. Mix a batch of mortar or a suitable adhesive according to the manufacturer’s instructions and spread it evenly over the metal lath using a trowel.
- Let the scratch coat cure: Allow the scratch coat to cure and dry completely before proceeding with the thin stone veneer installation. The curing time may vary depending on the specific product used, so refer to the manufacturer’s recommendations.
By properly preparing the surface before installing thin stone veneer, you can ensure a strong and durable installation that will enhance the beauty of your space for years to come.
Tools and Materials Needed for Thin Stone Veneer Installation
When it comes to installing thin stone veneer, having the right tools and materials is essential to ensure a successful project. The following guide will outline the necessary items you will need for a smooth and efficient installation process.
Tools:
- Trowel: A trowel is a key tool for applying mortar to the backside of the stone veneer and to the surface being covered.
- Notched trowel: This tool has notches on one side that help create ridges in the mortar. These ridges improve the grip and adhesion of the veneer to the surface.
- Level: A level will ensure that the veneer is installed straight and level. This tool is crucial to achieving a professional and aesthetically pleasing result.
- Hammer: A hammer is needed for tapping the stone veneer into place and for making adjustments during the installation process.
- Masonry saw: A masonry saw with a diamond blade is necessary for cutting the thin stone veneer to the desired size and shape.
- Grout bag: A grout bag is used to apply mortar to small gaps and joints between the stone veneer pieces.
- Bucket: A bucket is required for mixing the mortar and water to the appropriate consistency.
- Safety goggles and gloves: Safety goggles and gloves are essential for protecting your eyes and hands during the installation process.
Materials:
- Thin stone veneer: This is the main material of the project and comes in various colors, textures, and shapes.
- Mortar mix: A high-quality mortar mix is necessary for proper adhesion and strength of the stone veneer. It is important to choose a mortar mix that is specifically designed for thin stone veneer installation.
- Water repellent membrane: A water repellent membrane is used to protect the backside of the stone veneer from moisture and prevent efflorescence.
- Wire mesh: Wire mesh is installed over the existing surface before applying the thin stone veneer. It provides structural support and enhances the adhesion of the veneer.
- Scratch coat: A scratch coat is applied before installing the thin stone veneer. It creates a rough surface that helps the mortar bond to the wire mesh and provides additional support.
By ensuring that you have the right tools and materials on hand, you can confidently proceed with your thin stone veneer installation. With proper preparation and attention to detail, you can create a beautiful and durable finish that will enhance the aesthetic appeal of any space.
Step-by-Step Guide on Installing Thin Stone Veneer
Installing thin stone veneer is a great way to enhance the look of your home or business. Whether you’re using it for a fireplace surround, an accent wall, or an exterior facade, thin stone veneer can transform any space into a stunning focal point. This ultimate guide will walk you through the step-by-step process of installing thin stone veneer, from preparation to finishing touches.
1. Prepare the surface: Before installing thin stone veneer, it’s crucial to prepare the surface properly. Clean the area where you’ll be applying the veneer, and ensure it is free from dust, dirt, and debris. If necessary, repair any cracks or uneven areas.
2. Apply a weather-resistant barrier: Next, apply a weather-resistant barrier to the surface. This will help protect the veneer from moisture and ensure its longevity. Follow the manufacturer’s instructions for applying the barrier.

3. Mix the mortar: Mix the mortar according to the manufacturer’s instructions. A thin, consistent mixture is ideal for applying thin stone veneer. Make sure to use a mortar that is specifically designed for veneer installation.
4. Apply the mortar: Using a trowel, spread a thin layer of mortar onto the surface where you’ll be installing the veneer. Create grooves in the mortar using a notched trowel to ensure a strong bond between the veneer and the surface.
5. Install the veneer: Carefully place the thin stone veneer onto the mortar, pressing it firmly into place. Use a level to ensure it is straight and aligned with the surrounding area. If necessary, trim the veneer to fit using a wet saw or a score-and-snap cutter.
6. Fill the gaps: Once the veneer is in place, fill the gaps between the stones with additional mortar. Use a grout bag or a trowel to apply the mortar, ensuring it reaches the bottom of the joints. Smooth the surface of the mortar with a jointing tool.
7. Clean and seal the veneer: After allowing the mortar to dry for the recommended time, use a stiff brush to clean any excess mortar from the surface of the veneer. Apply a sealer to enhance the color and protect the veneer from stains and weathering. Follow the manufacturer’s instructions for the sealer.
8. Finishing touches: Lastly, inspect the installed veneer for any imperfections or areas that require touch-ups. Make any necessary repairs and touch up the mortar or sealer as needed.
By following this step-by-step guide, you’ll be able to install thin stone veneer with ease. Remember to always refer to the manufacturer’s instructions for specific product recommendations and installation guidelines. Enjoy the beauty and durability of your newly installed thin stone veneer!
Adding Design Elements with Thin Stone Veneer
Thin stone veneer is a versatile material that can be used to enhance the design of any space. Whether you’re looking to add a rustic element to a cozy cottage or create a sleek and modern look for a contemporary home, using thin stone veneer can help you achieve your design goals.
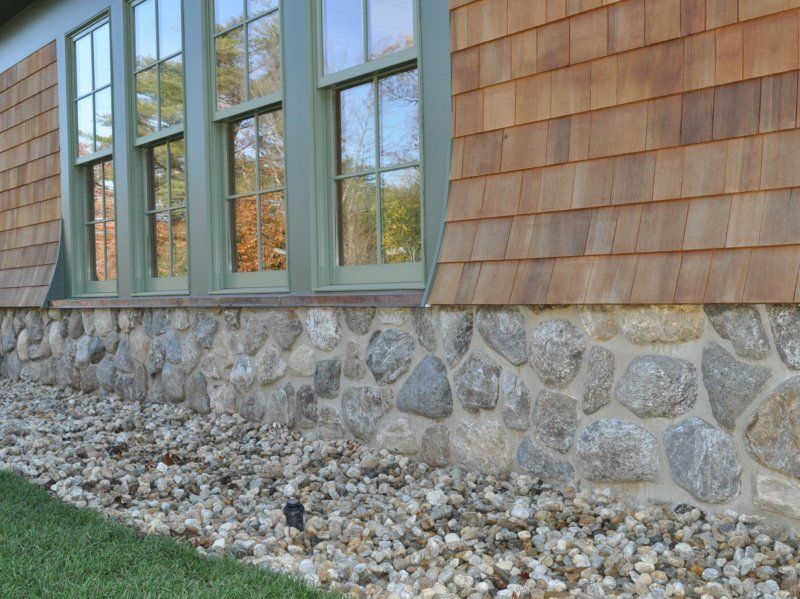
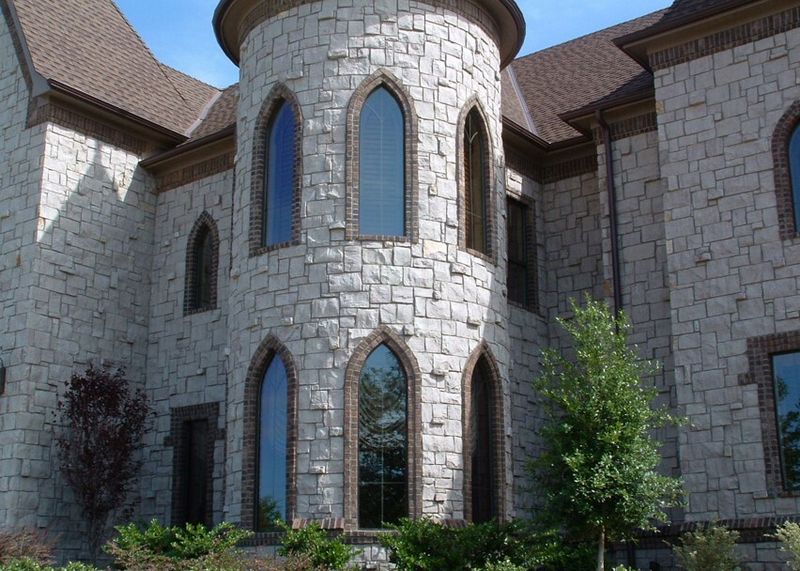
One of the key benefits of thin stone veneer is its ability to be used in both interior and exterior applications. This means you can incorporate this material into various design elements throughout your home, such as accent walls, fireplaces, kitchen backsplashes, and even outdoor living spaces.
When using thin stone veneer, it’s important to consider the overall aesthetic you want to achieve. For a traditional and timeless look, consider using thin stone veneer in earthy tones, such as browns and greys. This can help create a warm and inviting atmosphere. On the other hand, if you want to make a bold statement, you can opt for vibrant colors or unique patterns to add a touch of drama to your space.
In addition to color, the shape and size of the thin stone veneer can also play a significant role in your design. Thin stone veneer is available in various shapes, including squares, rectangles, and irregular shapes. By mixing and matching different shapes, you can create visually interesting patterns and textures.
Another way to add design elements with thin stone veneer is by combining it with other materials. For example, you can use thin stone veneer as an accent alongside wood or metal to create a dynamic contrast. This combination of different textures and materials can provide a unique and visually appealing look to any space.
The possibilities are endless when it comes to using thin stone veneer to add design elements to your home. Whether you’re aiming for a rustic, contemporary, or traditional look, thin stone veneer can help you achieve your desired aesthetic. By considering factors such as color, shape, and material combinations, you can create a truly customized and visually stunning space.
Creating Different Patterns and Textures with Thin Stone Veneer
When using thin stone veneer, you have the ability to create a variety of patterns and textures, giving your project a unique and aesthetically pleasing look. The versatility of thin stone veneer allows you to achieve the desired effect, whether you want a rustic or modern design.
One of the most popular patterns that can be created with thin stone veneer is the “stacked” pattern. In this pattern, the stones are stacked on top of each other horizontally, creating a clean and symmetrical look. This pattern is commonly used for fireplace surrounds and accent walls.
Another pattern that can be achieved with thin stone veneer is the “random” pattern. In this pattern, the stones are laid out in a random order, creating a more natural and organic look. This pattern is often used for exterior walls and walkways, giving the illusion of a wall made of natural, irregular stones.
For those looking to add texture to their project, the “rough cut” pattern is a great option. In this pattern, the stones are cut unevenly to create a rough and rugged look. This pattern adds depth and character to any space and is commonly used for outdoor living areas and garden walls.
If you want to create a more contemporary and sleek design, the “strip” pattern is a perfect choice. In this pattern, thin stone veneer strips are laid out horizontally or vertically, creating a clean and minimalist look. This pattern is often used for modern fireplace surrounds and feature walls.
No matter what pattern or texture you choose, it is important to carefully plan and layout your thin stone veneer before installation. This will ensure that you achieve the desired effect and minimize waste. Additionally, regularly cleaning and maintaining your thin stone veneer will help to preserve its appearance and prolong its lifespan.
In conclusion, using thin stone veneer allows for endless possibilities when it comes to creating patterns and textures in your design. Whether you prefer a traditional or contemporary look, thin stone veneer can be used to achieve the desired effect. So, get creative and have fun exploring the many options that thin stone veneer has to offer!
Maintenance Tips for Thin Stone Veneer
Proper maintenance is essential for the longevity and appearance of your thin stone veneer. Here are some maintenance tips to guide you in using and caring for your ultimate stone veneer:
- Regularly clean the surface of your thin stone veneer using a soft brush or cloth. This will help remove dust, dirt, and other debris that may accumulate over time.
- Ensure that the mortar joints are in good condition. Inspect them regularly and repair any cracks or gaps to prevent moisture penetration behind the stone veneer.
- Avoid using harsh chemical cleaners or abrasive materials on your thin stone veneer, as they can damage the surface. Stick to mild, pH-neutral cleaning solutions recommended by the manufacturer.
- Apply a stone sealant to protect your thin stone veneer from stains and moisture. This will help maintain its color and prevent water damage. Follow the manufacturer’s instructions for application and reapplication frequency.
- Inspect the caulking around windows, doors, and other openings in your stone veneer. Replace any deteriorated caulking to ensure proper sealing and prevent water infiltration.
- Regularly check for signs of mold or mildew growth on your thin stone veneer. If you notice any, clean it immediately using a mildew remover and take measures to prevent future growth, such as improving ventilation.
- During the winter months, be wary of de-icing salts or chemicals that may come in contact with your stone veneer. These substances can cause discoloration and damage to the surface. Promptly remove any salt residue and rinse the area with water.
- Keep an eye out for any loose or damaged stones in your veneer. If you notice any, contact a professional to repair or replace them to maintain the integrity and aesthetics of your ultimate stone veneer.
- Lastly, it is important to follow any additional maintenance guidelines provided by the manufacturer of your thin stone veneer. They may have specific recommendations for your particular product.
By following these maintenance tips, you can ensure that your thin stone veneer remains beautiful and durable for years to come.
Q&A:
What is thin stone veneer and how is it different from regular stone?
Thin stone veneer is a lightweight alternative to traditional stone. It is made by slicing thin layers from natural stone or by replicating the look of natural stone with manufactured materials. It is different from regular stone because it is much thinner and weighs significantly less, making it easier to install and work with.
How do I install thin stone veneer?
Installing thin stone veneer involves several steps. First, you need to prepare the surface by cleaning it and applying a layer of mortar. Then, you can start attaching the veneer pieces to the surface, making sure to leave enough space between them for grout. Finally, you can apply the grout and clean any excess. It is a relatively straightforward process, but it requires some skill and attention to detail.
Can I install thin stone veneer by myself, or do I need to hire a professional?
It is possible to install thin stone veneer by yourself if you have some experience with masonry work. However, it can be a challenging and time-consuming task, especially if you are covering a large area or working with complex designs. If you are not confident in your abilities or if you want to ensure a professional result, it is recommended to hire a professional installer.
How do I design with thin stone veneer?
Designing with thin stone veneer involves considering several factors, such as the color, texture, and size of the stones, as well as the overall style and aesthetic of your space. You can create a cohesive look by using stones that complement other elements in your design, such as the flooring or the furniture. Additionally, you can play with patterns and arrangements to create visual interest and focal points.
How do I maintain thin stone veneer?
To maintain thin stone veneer, you should regularly clean it with a mild detergent and a soft brush or cloth. Avoid using harsh chemicals or abrasive materials that could damage the surface. It is also important to inspect the veneer for any signs of damage or deterioration, such as cracks or loose stones, and to address them promptly to prevent further problems. Additionally, you should protect the veneer from extreme weather conditions and apply a sealant to enhance its durability.
What is thin stone veneer and how does it differ from natural stone?
Thin stone veneer is a lightweight, flexible stone product that is used as a decorative covering for walls, floors, and other surfaces. It differs from natural stone in that it is thinner and more easily applied, making it a great alternative for projects where weight and ease of installation are considerations.


